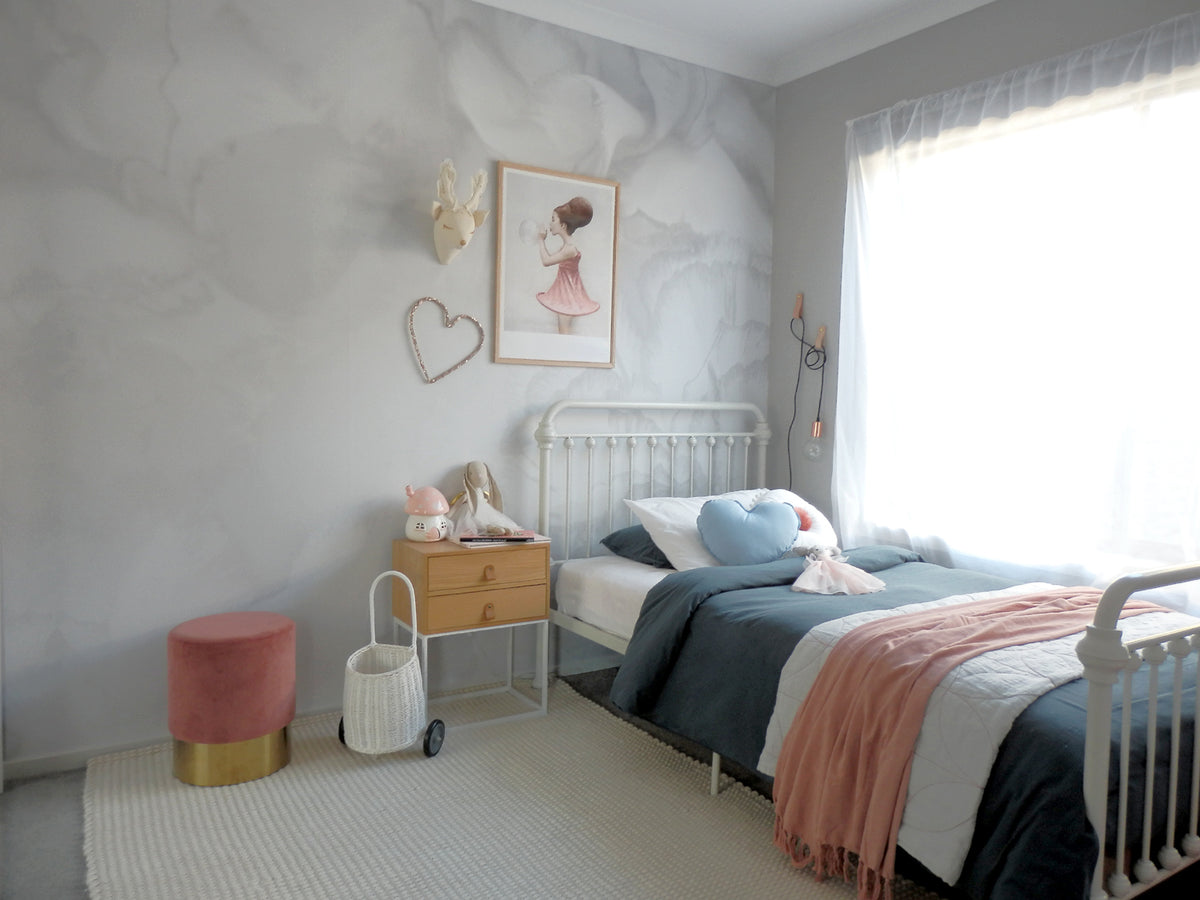
DIY REMOVABLE WALLPAPER

 Last week after Christie's room reveal, I had a few people asking me about the wallpaper we put up, where its from how or who installed it etc.. So I though this DIY tutorial would help out so much for all those asking.
As soon as I started planning Christies big girl room I knew I wanted a feature wall, I always loved wallpaper, but hubby isn’t a fan and would not agree to it. Once I had told him about removeable wallpaper he was pretty much on board. {as long as I take it down on my own he says if I get bored of it ha ha }
I then started discussing with Kristy from Minnie and Me Interiors in creating a custom wallpaper. She was an absolute gem to work with and started the search for a custom design for me. After informing her in what I wanted and had in mind she came back with so many options, colors and designs she made it super hard to decide.
We ended up finding this super amazing image which I decided to change its color to a grey, this would be a subtle transition keeping to my homes color palate and meant I would be able to change the room at any stage.
Kristy immediately proceeded to customize the wallpaper for me and sending through a sample, which only confirmed that I loved the image and would go ahead with the design.
Now for the part I know so many would have questions about is the installation. The wallpaper was easy to install. Kristy provides detailed instructions with the wallpaper and has helpfully links on application, she was also always ready to answer any questions I had.


Firstly, I removed everything from my walls, filled up any holes and sanded down the patches to ensure an even surface. I then cleaned the wall with a wet cloth and let it try for a day. I do suggest maybe sanding down the whole wall just to make sure there are no bumps or lumps as these may not always be visible on the wall but will show once wallpaper is up.
Installing the wallpaper is a two-man job (two people). Once we opened the wallpaper and found panel 1, before we removed the backing, we set it up as per the instructions to ensure it was straight. We then proceeded with the removal of the backing by slowly removing bit by bit the backing and smoothing the wallpaper on the wall with our palms. We ended up also using a small wallpaper smoother tool which eventually helped with the corner, around the sockets and at the end where the wallpaper met the skirting. This gave us a clean finish when we had to trim down the wallpaper.
Once the 1st panel was on the other two came easy to set up. Hubby was usually at the top setting it up and I was slowly removing the backing while helping smooth it out too. We trimmed around the sockets as we installed each panel to help us smooth out each panel as best as possible rather than leaving it at the end.


Once we had all 3 panels up, we trimmed the end corner and at the skirting. A few air bubbles did pop up after a day or so even though when we installed the wallpaper everything was completely smooth. If this may happen to yours then simply use a little pin to pop a hole and smooth it out this made all the bubbles disappear instantly.

Another thing I'm always hesitant to do is nail through the walls in my home so I use removable command wall hooks for all my artwork or anything ill hang from the walls.
For Christie's room I used clear command hooks for the print and wall bust and installed them as per the instructions on the box ( I also left them a whole day without hanging anything off them just to make sure they were stuck on correctly) I do suggest testing them out before use or if you will be hanging above beds or cots to ensure they are stuck on as per instructions and use the appropriate weight guide line. I've only used light weight frames for all my prints and frames without glass. This is to ensure they are lightweight and wont peel off. Both the main print and wall bust are light weight and I did remove the frames glass.
TIP:
1. I highly recommended sanding down the whole wall and maybe giving it a wash twice just to be on the safe side. Make sure you let it dry a full day too.
2. Take your time setting up the first panel as this will set the whole tone for the other panels and the end look being cohesive.
3. Use a wallpaper smoothing tool to help smooth out the wallpaper and give a clean finish when its time to trim the excess wallpaper.
I hope this information helps you out, if you have any questions please feel free to ask.
This Blog is in collaboration with Minnie & Me Interiors. I have only shown what i truly love, all wording and imagery are my own.